


수성컴전자방입니다. 오늘은 Raspberry Pi 4 Model B에 쿨링팬을 장착하고 CPU 온도가 높아지면 팬이 작동하도록 하는 Python 코드를 짜 보겠습니다. 팬은 Raspberry Pi 4 Case Fan을 사용하겠습니다.
목차
1. 쿨링팬 장착
2. sudo apt install python3-lgpio
3. fanAuto.py
4. fanScript.sh
5. 부팅 시 자동 실행(/etc/systemd/system/fan.service)
6. 글 마무리
7. 참고 자료
1. 쿨링팬 장착
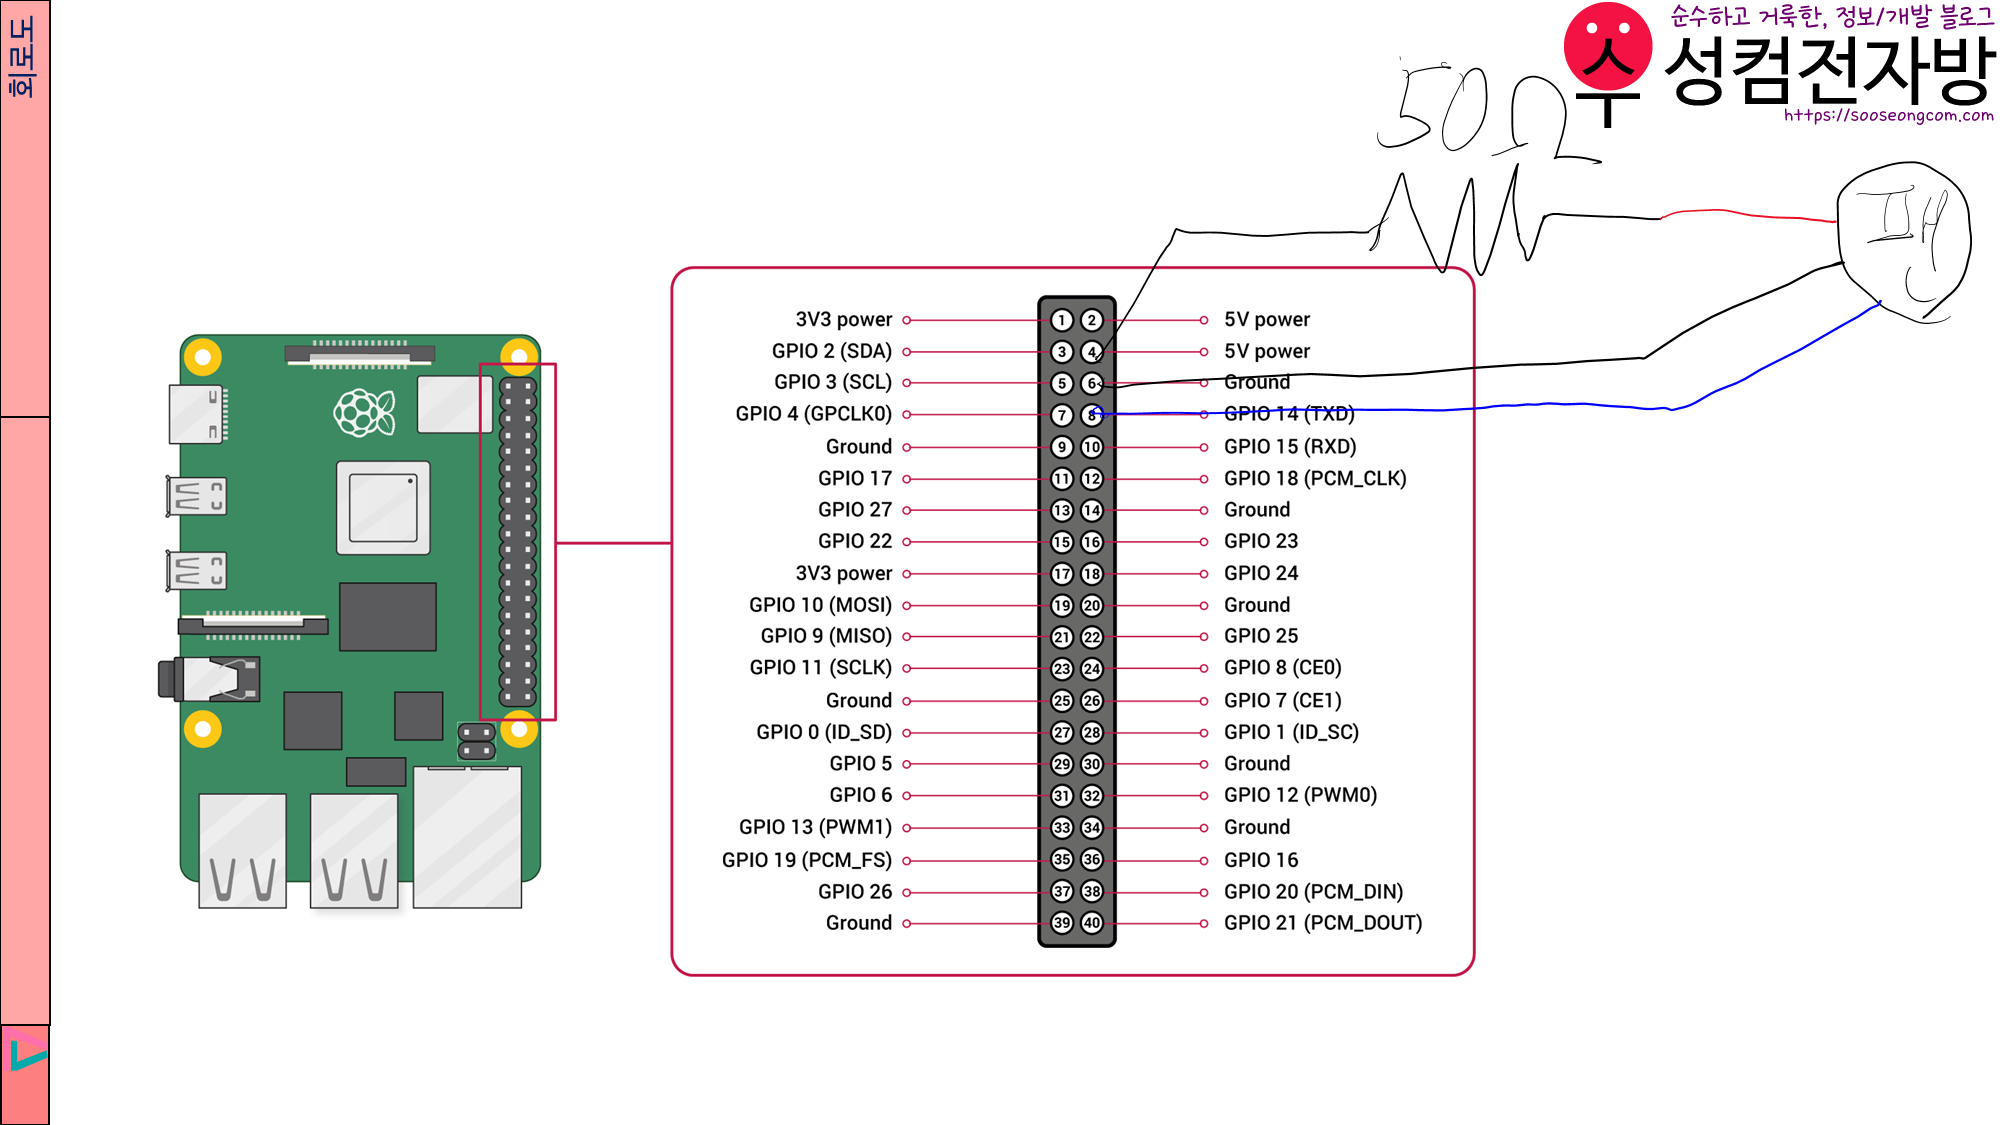
빨간색 선은 저항을 거쳐서 5V power에 연결하고, 검은색 선은 Ground에, 파란색 선은 GPIO 14에 연결합니다.
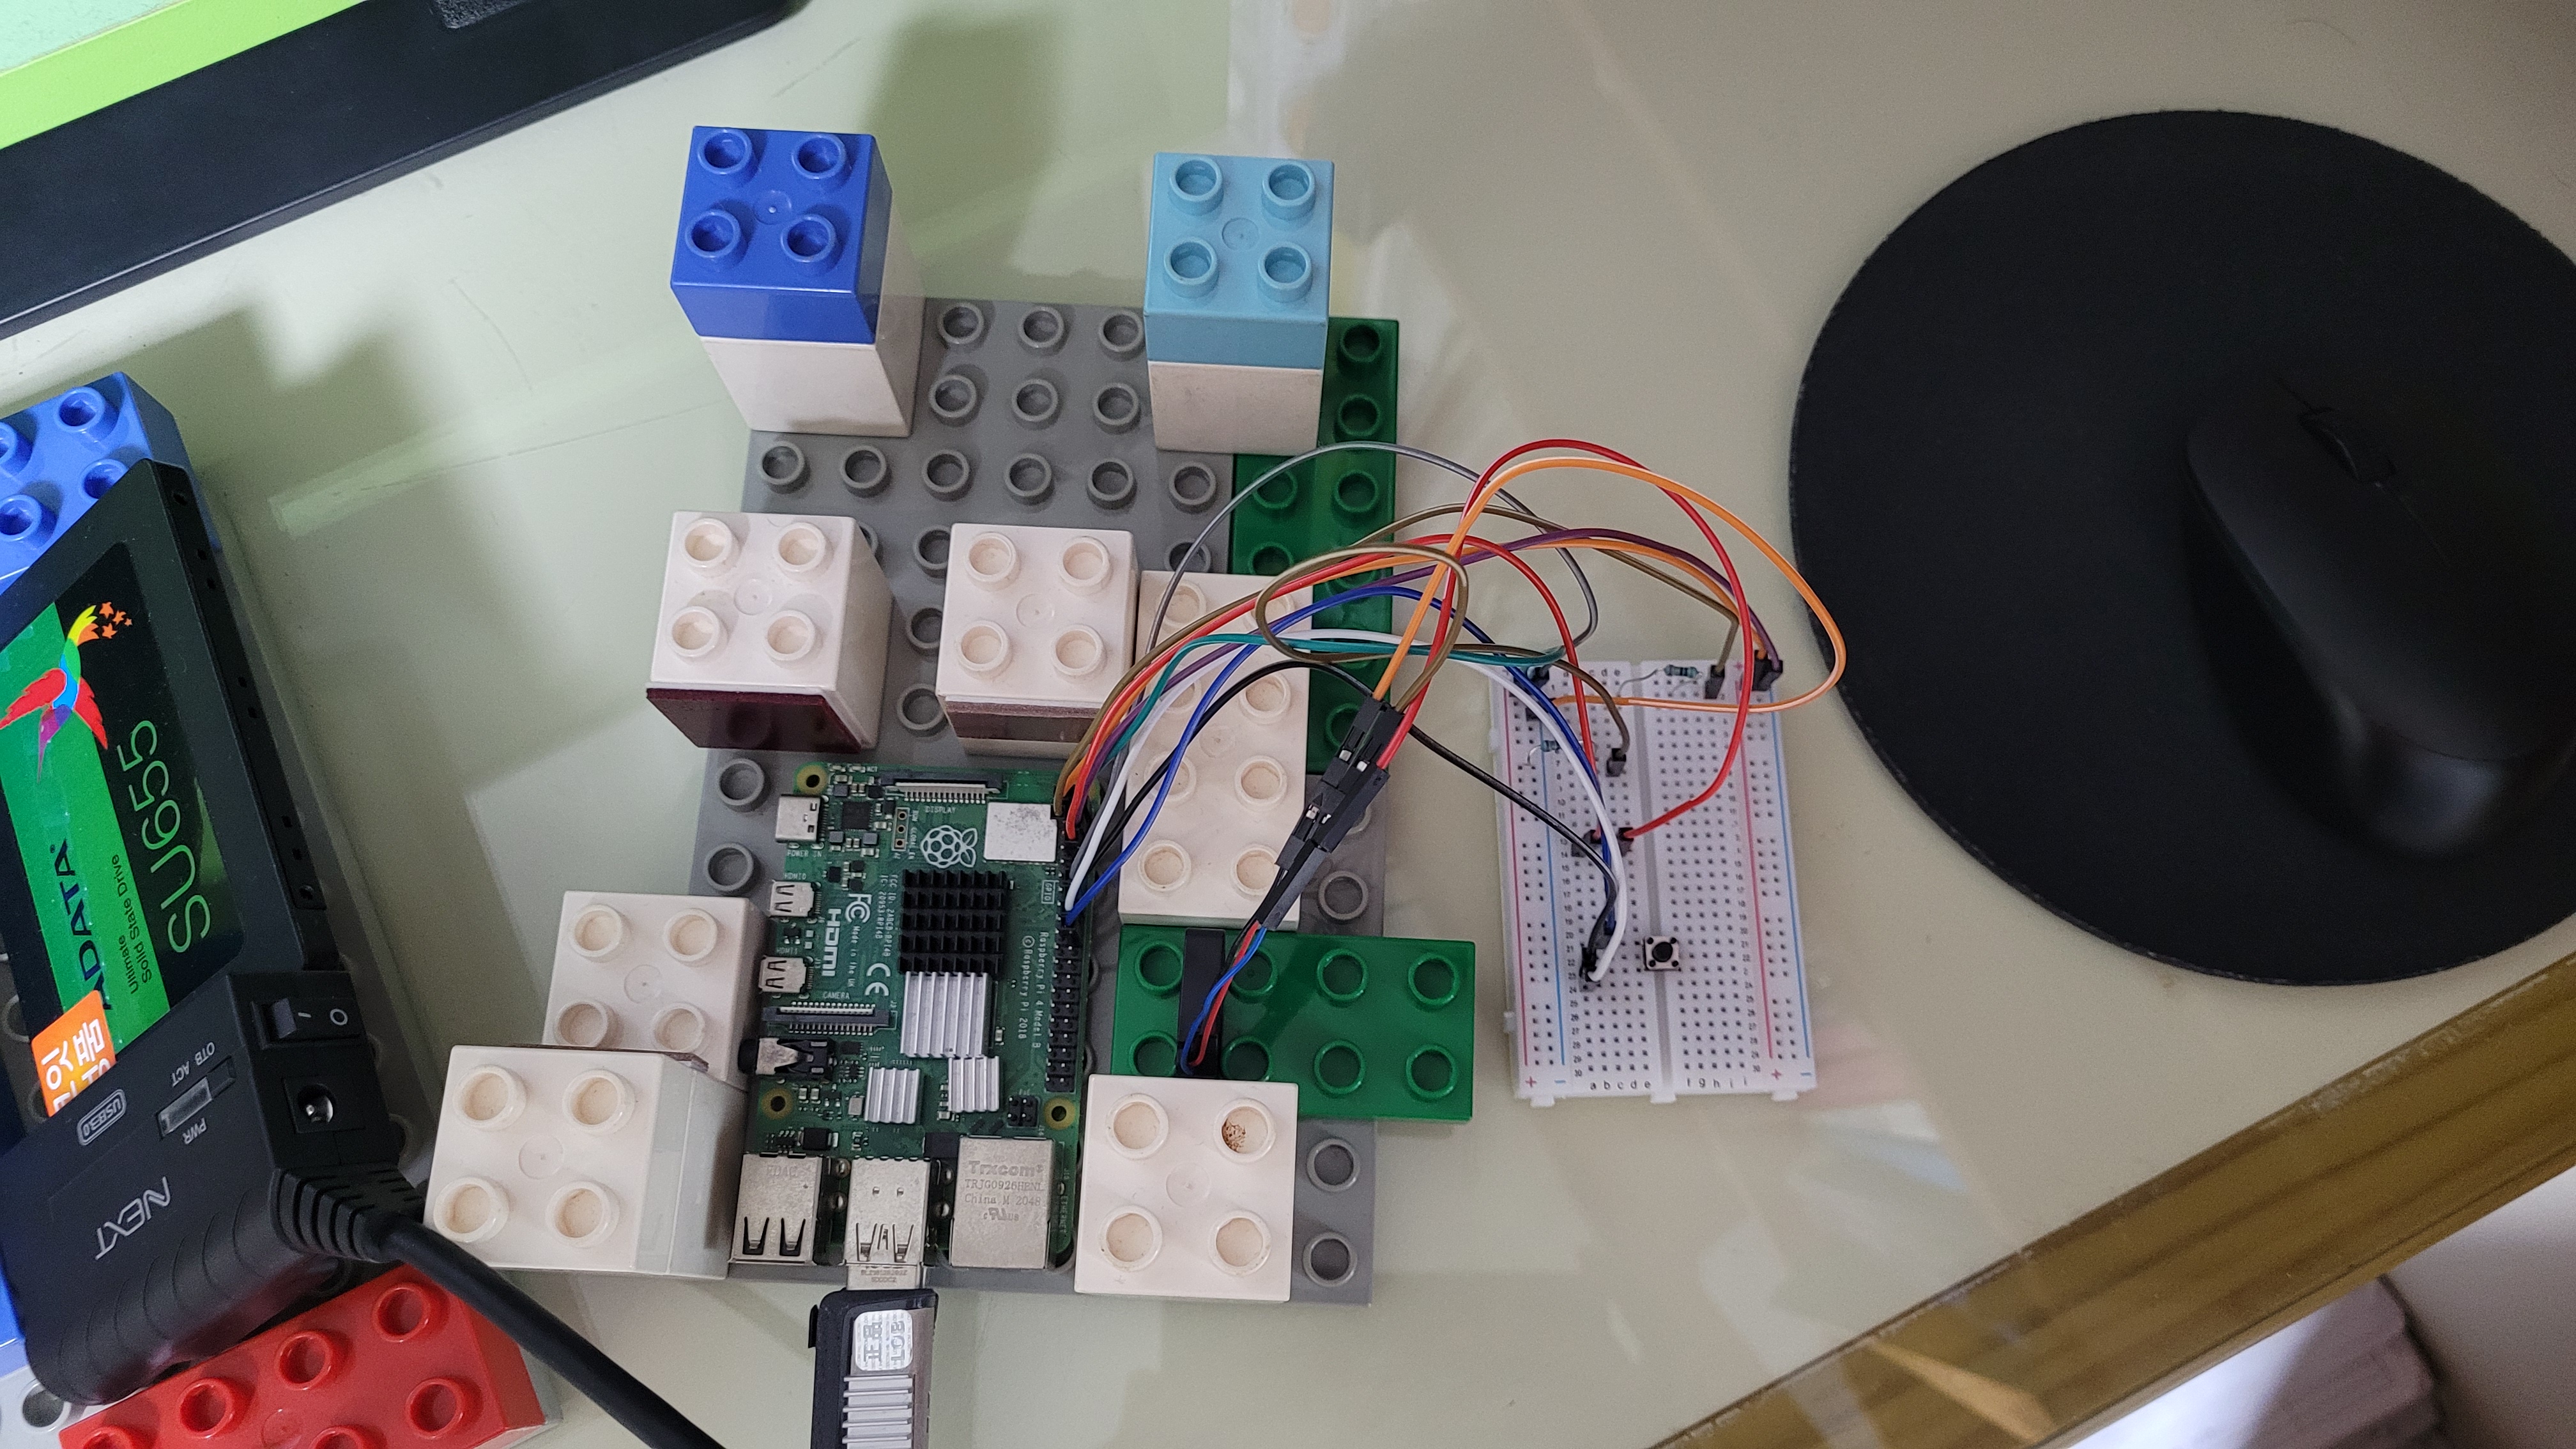
저는 브레드보드를 사용했습니다. 위의 사진에는 전선이 많고 팬 외의 다른 부품들도 있어서 회로도를 보시는 것이 편할 것입니다.
2. sudo apt install python3-lgpio
sudo apt install python3-lgpio 명령을 실행하여 Python3와 lgpio 라이브러리를 설치합니다.
3. fanAuto.py
파일 경로와 파일명은 본인이 편한 것으로 하면 됩니다.
import lgpio
from subprocess import check_output
from re import findall
import time

#라즈베리파이의 온도를 산출하는 함수
def get_temp() -> float:
    temp_o = check_output(["vcgencmd","measure_temp"]).decode() #vcgencmd measure_temp
    temp: float = float(findall(r"\d+\.\d+", temp_o)[0]) #temp_o에서 온도(d.d)만 추출하여 temp에 저장
    return(temp)

try:
    tempOn: float = 60 #팬을 작동시킬 기준 온도
    threshold: float = 10 #팬을 돌리기 시작하면 tempOn보다 얼마나 더 온도를 내릴 것인가?
    controlPin: int = 14 #팬이 연결된 GPIO 핀 번호
    pinState: bool = False #True일 때 팬 작동, False일 때 팬 미작동
    h = lgpio.gpiochip_open(0)
    lgpio.gpio_claim_output(h, controlPin)
    while True:
        temp: float = get_temp()
        if ((temp >= tempOn) and (not pinState)) or ((temp < tempOn - threshold) and pinState):
            pinState = not pinState
            lgpio.gpio_write(h, controlPin, pinState)
        print(time.strftime("%Y.%m.%d. %H:%M:%S ") + str(temp) + "˚C " + str(pinState))
        time.sleep(1)

except KeyboardInterrupt:
    print("Exit pressed Ctrl+C")
    lgpio.gpiochip_close(h)
finally:
    print("End of program")
[Line 1]
import lgpio
GPIO를 조작하기 위해 lgpio를 import합니다.
[Line 21~23]
(ⅰ) temp>=tempOn이고 pinState==False (팬을 작동시켜야 하는 온도에 도달한 상태)
또는
(ⅱ) temp<tempOn-threshold이고 pinState==True (작동 중인 팬을 꺼도 되는 상태)
이면 22행에서 pinState를 반대로 바꾸고 23행에서 GPIO 핀(controlPin 변수)에 pinState를 적용합니다.
제가 일일이 설명하지 않은 나머지는 코드와 주석 보시면 이해하실 수 있을 것 같습니다.
4. fanScript.sh
fanAuto.py를 실행하기 위한 셸 스크립트를 만듭니다.
#!/bin/bash
python3 <파일이 있는 경로>/fanAuto.py
exit 0
[Line 2]
python3 <파일이 있는 경로>/fanAuto.py
예) python3 /home/sooseongcom/fan/fanAuto.py
참고로 이 스크립트는 root 권한(sudo)으로 실행해야 작동합니다.
5. 부팅 시 자동 실행(/etc/systemd/system/fan.service)
5.1. cd /etc/systemd/system 명령을 실행하여 /etc/systemd/system 경로로 이동합니다.
5.2. sudo touch fan.service 명령을 실행하여 fan.service를 생성합니다.
5.3. sudo chown 사용자계정명 fan.service 명령을 실행하여 fan.service 소유자를 변경합니다.
5.4. fan.service를 아래와 같이 작성합니다.
[Unit]
Description=Fan Auto Script
After=network.target

[Service]
ExecStart=/home/sooseongcom/fan/fanScript.sh
Restart=on-failure
RestartSec=60
User=root
StandardOutput=file:/home/sooseongcom/fan/fanScript.log
StandardError=file:/home/sooseongcom/fan/fanScript_error.log

[Install]
WantedBy=multi-user.target
파일 경로 및 파일명은 모두 예시입니다.
[Line 2 Description]
임의로 설명을 작성합니다.
[Line 3 After]
After=network.target
After는 어떤 작업 이후에 자동 실행할 것인지 정합니다. 우리는 network.target 실행 후 자동 실행하도록 하겠습니다.
[Line 5 Service]
[Service]
fan.service 파일이므로 [Service] 섹션이 있어야 합니다.
[Line 6 ExecStart]
ExecStart=<파일이 있는 경로>/fanScript.sh
[Line 7 Restart]
Restart=on-success이면 Unit 프로세스가 exit==0일 때 그 서비스를 재시작합니다.
Restart=on-failure이면 Unit 프로세스가 exit!=0일 때 그 서비스를 재시작합니다.
[Line 8 RestartSec]
서비스 재시작 전 그 서비스를 몇 초 sleep할지 정합니다.
[Line 9 User]
User=root으로 설정하여 root 권한으로 실행하게 합니다.
[Line 10 StandardOutput]
StandardOutput=file:<파일이 있는 경로>/fanScript.log
로그 파일을 저장할 경로를 지정합니다. 이때 경로 앞에 file:을 붙여야 합니다.
[Line 11 StandardError]
StandardError=file:<파일이 있는 경로>/fanScript_error.log
에러 시 로그 파일을 저장할 경로를 지정합니다. 이때 경로 앞에 file:을 붙여야 합니다.
5.5. 이제 라즈베리파이를 재부팅하면 fanAuto.py가 자동으로 실행되며 특정 온도가 되면 팬이 작동됩니다.
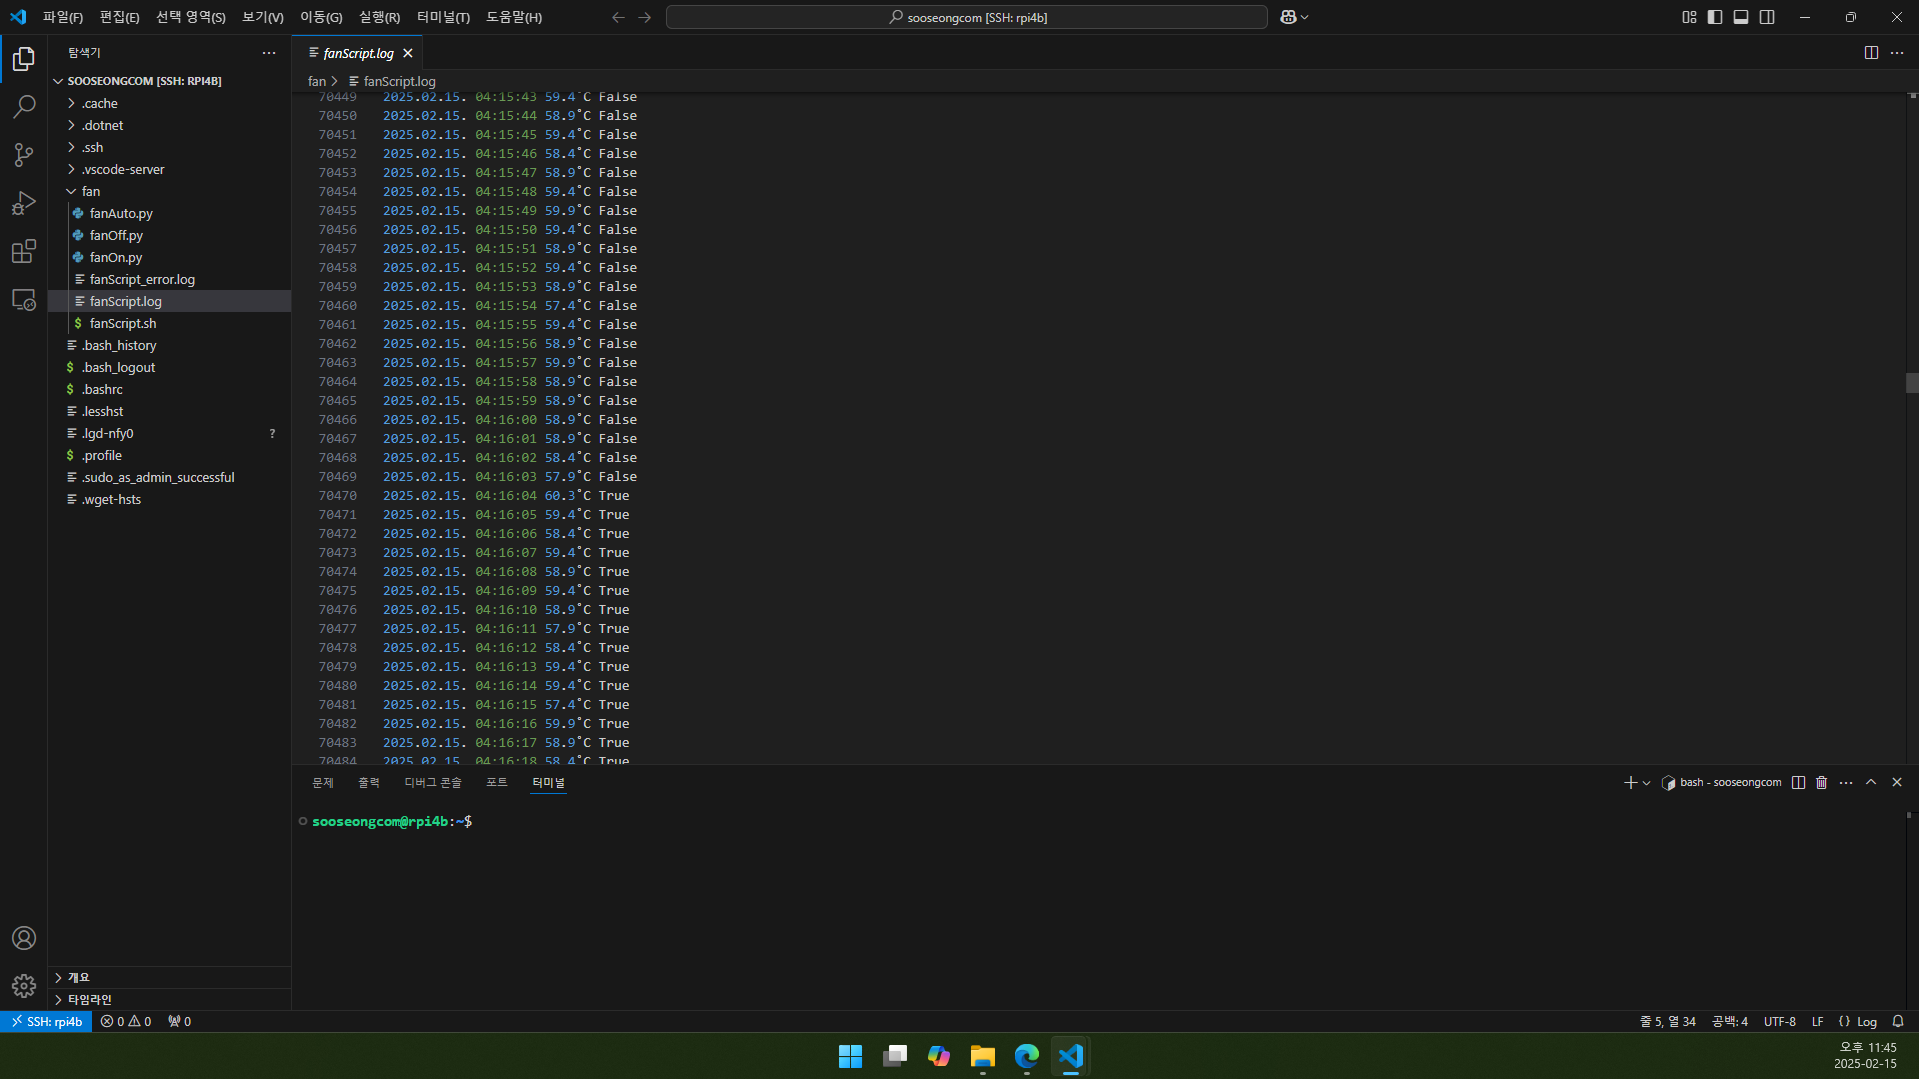
5.6. <파일이 있는 경로>/fanScript.log를 보면 fanAuto.py의 출력 결과(예제 24행 참고)를 확인할 수 있습니다.
6. 글 마무리
제 글을 읽어 주셔서 감사합니다. 다음에 만나요!
7. 참고 자료
1) codingDNA. 2022. “[Python] 현재시간 출력 및 포맷팅 방법 (time, datetime library)”, Coding DNA. (2025. 02. 15. 방문). https://bio-info.tistory.com/118
2) markyang92. 2021. “systemd service”, markyang92.log. (2025. 02. 15. 방문). https://velog.io/@markyang92/systemd-timer
3) kimdragon. 2022. “[리눅스] systemd란? systemd unit파일 작성 방법”, kim.dragon. (2025. 02. 15. 방문). https://kim-dragon.tistory.com/202
4) NineKY. 2023. “Systemd 서비스 생성 시, 지정한 경로에 로그가 저장 안 될 때”, 사이트명. (2025. 02. 15. 방문). https://coinz.tistory.com/633
5) resolver101 외 2명. 2018. “systemd “status=203/EXEC” error when creating new service”, StackExchange. (2025. 02. 15. 방문). https://unix.stackexchange.com/questions/472950/systemd-status-203-exec-error-when-creating-new-service
6) 낙낙이. 2020. “우분투 18.04 (리눅스) 부팅 시 자동 파이썬 실행”, 낙낙이 기술 블로그. (2025. 02. 15. 방문). https://naknaklee.github.io/etc/2020/07/19/linux-auto-start/
7) latch. 2025. “Ubuntu 자동실행 스크립트 만들기”, memorybank. (2025. 02. 15. 방문). https://flipflop.tistory.com/8
8) 규남. 2025. “우분투 18.04, 20.04 자동실행, 서비스등록”, 규나미의 블로그. (2025. 02. 15. 방문). https://nasanx2001.tistory.com/entry/우분투-1804-자동실행-서비스등록
9) jjosephliu외 2명. 2021. “Ubuntu Server not listening to config.txt overclocking”, Raspberry Pi. (2025. 02. 15. 방문). https://forums.raspberrypi.com/viewtopic.php?t=313735
10) 코스모스. 2021. “뜨거워진 라즈베리파이 CPU 온도, 파이썬으로 쿨링팬 자동 제어”,
사소한 시선(視線). (2025. 02. 15. 방문). https://blog.naver.com/jcosmoss/222549963664
11) Sean Hammond 외 3명. 2018. “How to fix “SyntaxWarning: invalid escape sequence” in Python?”, stackoverflow. (2025. 02. 15. 방문). https://stackoverflow.com/questions/52335970/how-to-fix-syntaxwarning-invalid-escape-sequence-in-python
12) Bugwhale. 2020. “라즈베리파이 라즈비안 GPU, CPU 온도 확인(RaspberryPi temperature)”, Bugwhale World. (2025. 02. 15. 방문). https://bugwhale.tistory.com/entry/raspberrypi-raspbian-monitor-temperature
13) no name. n. d. “04 모든 문자열 패턴 찾기 (findall)”, 위키독스. (2025. 02. 15. 방문). https://wikidocs.net/80570
14) Ubuntu. n. d. “How to use Raspberry Pi GPIO pins with Ubuntu”, Ubuntu Tutorials. (2025. 02. 15. 방문). https://ubuntu.com/tutorials/gpio-on-raspberry-pi
15) Raspberry Pi. n. d. “GPIO and the 40-pin header”, Raspberry Pi Documentation. (2025. 02. 15. 방문). https://www.raspberrypi.com/documentation/computers/raspberry-pi.html#gpio